How to install PostgreSQL for use with Monitor BI
This guide is used when installing Monitor BI with PostgreSQL as the database engine.
We recommend installing Monitor BI in a separate PostgreSQL cluster, especially if PostgreSQL is already being used for Monitor ERP. This makes it possible to manage backups more efficiently and avoids backing up the entire PostgreSQL cluster unnecessarily.
The guide below describes how to install PostgreSQL, create a database and user, and connect Monitor BI to PostgreSQL.
Preparations (Windows)
-
Go to the official download site for PostgreSQL.
-
Click the Download the installer link to download the installation file. Version 18 or later is required.
Installation description
Run the downloaded file and follow the installation guide below.
-
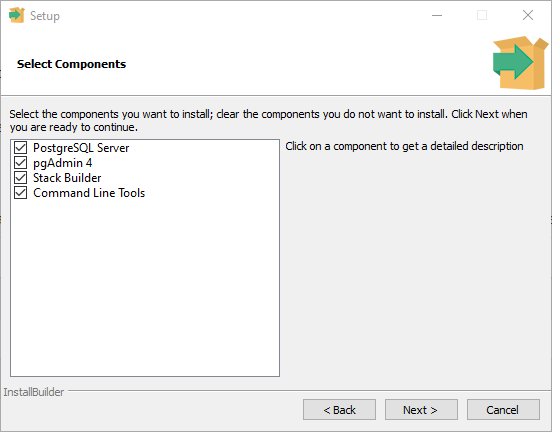
Select which components to install. PostgreSQL Server is required for the installation. The other components can be useful for database management. When you have selected which components to install, click Next.
When the installation is finished you can use pgAdmin 4 (if you installed that application). The pgAdmin 4 application is a graphical tool for managing and developing your database. It is included in the installation package you downloaded.
-
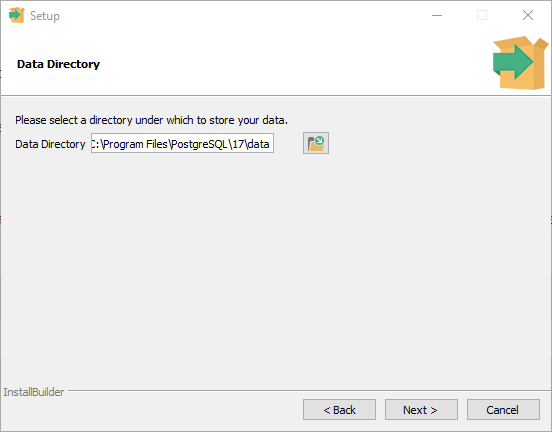
Select a directory for PostgreSQL data and then click Next.
-
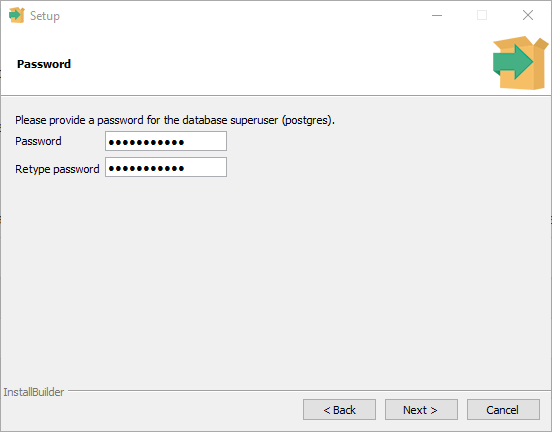
Enter a password for the PostgreSQL superuser and then click Next.
Please note! Make sure to remember the password you choose. The password cannot be changed if you forget it.
-
Enter the port number (the standard port is 5432), then click Next.
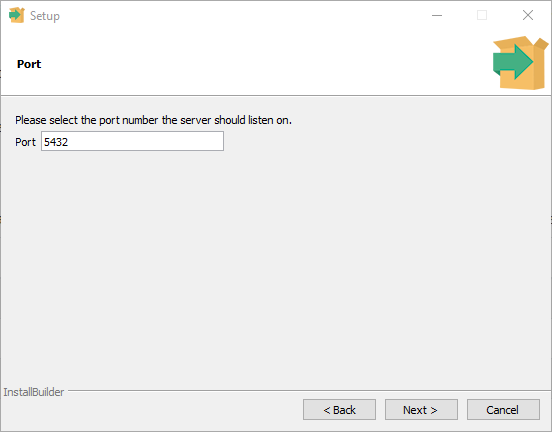
If PostgreSQL is already in use on the server, you must specify a port other than 5432. Otherwise Monitor BI cannot connect to the database.
-
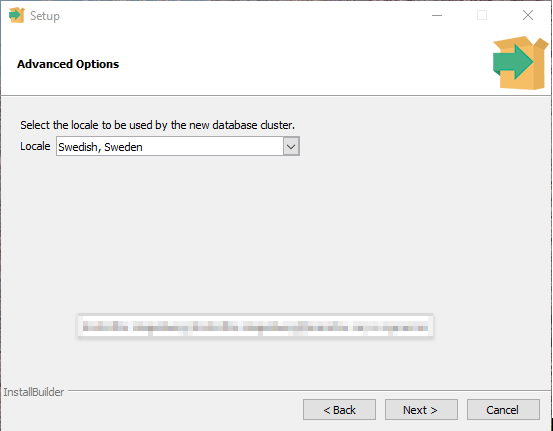
Enter your locale/region, then click Next.
-
Make sure everything is entered correctly in the summary, then click Next.
-
When the installation is finished, you can choose if Stack builder will be used to download additional tools, drivers, and applications to complement the PostgreSQL installation. Finish the installation by clicking Finish.
Configure user and database in PostgreSQL
Please note! This is only an example to illustrate how you can configure a user and a database in PostgreSQL to use with Monitor BI. The guide assumes that you install PostgreSQL on the same server as Monitor BI.
-
Start pgAdmin4.exe (for example: D:\PostgreSQL\pgAdmin4\runtime\pgAdmin4.exe).
-
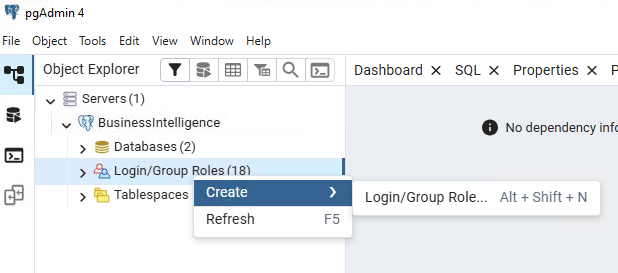
Right-click Login/Group Roles and select Create - Login/Group Role. Then create a username. In our example we will create the user BIuser.
-
Right-click the user you’ve created and select Properties.
-
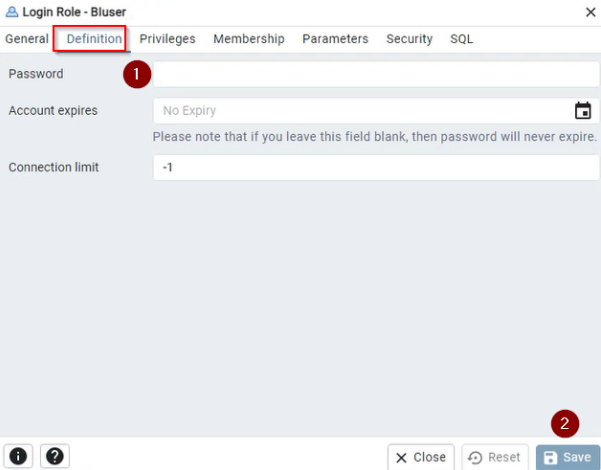
In order for the user to be able to authenticate and run the service, you need to add a password for the user under the Definition tab. Then click Save. Under the Privileges tab, it is sufficient that the Can login setting is activated for the user.
-
Right-click Databases, then Create and then Database.
-
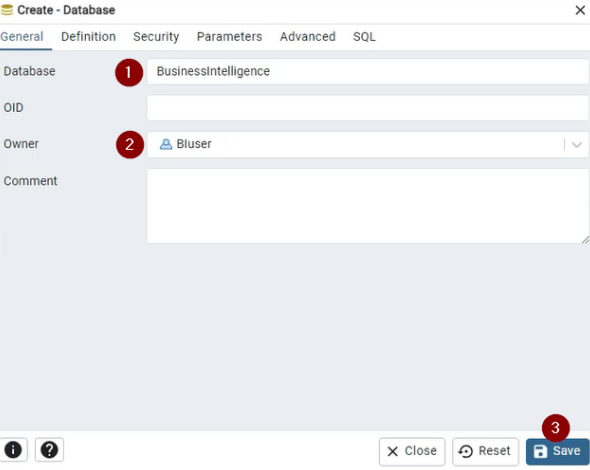
On the General tab, enter the database name in the Database field and the user name in the Owner field. Then click Save. In our example, we have chosen the database name BusinessIntelligence.
-
Backup: Data extracted from Monitor ERP to Monitor BI can always be recreated by extracting the data again.
-
It is therefore usually sufficient to back up the Settings database schema, which contains the configuration settings for Monitor BI.
-
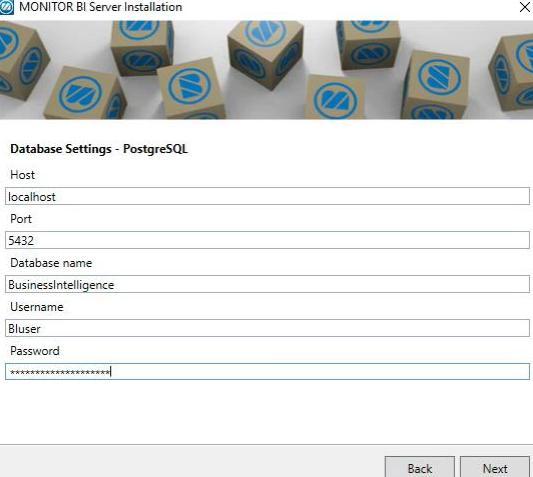
Run the file named MONITOR BI Server Setup.exe and install following the instructions. Select PostgreSQL as database. When you reach the step Database settings – PosgreSQL, you fill out the fields with the following information:
-
Host: localhost
-
Port: Selected port (the same port that was configured for the PostreSQL cluster)
-
Database name: BusinessIntelligence (only an example name)
-
Username: BIuser (only an example name)
Please note! Names in PostgreSQL are case sensitive. -
Password: The password you chose for BIuser
-
-
Right-click the two services Monitor BI server and Monitor Product Updater and select Properties. Under the setting Startup type, select Automatic (Delayed Start).