Ways of working with EIM
Here the different ways of working with EIM are described.
Scanning of paper invoices
- Place the paper invoice/invoices in the scanner.
- Open the Scan documents procedure.
- Make sure an Inbox has been selected under the Scan tab. The inbox should be registered as PDF inbox under the tab Paths for inboxes.
- Click the Scan button.
The scanned paper invoices will then be shown as images in the Scanned images box in the procedure.
 on the toolbar of the procedure or by pressing Ctrl + F6.
 On advanced scanners there is a display where you can choose how/where to save the scanned documents. If you have such a scanner you can scan directly to the folder which is registered as PDF inbox in the above procedure. Then you do not have to use that procedure to scan the invoices.
Handling of invoice received via e-mail
Alternative 1:
Save the attached invoice (PDF) from the e-mail program to the folder registered as PDF inbox. You can then register/preliminary record the invoice in the Register supplier invoice procedure.
Alternative 2:
Drag the attached invoice directly from the e-mail program to the invoice viewing window in the Register supplier invoice procedure. The invoice viewing window automatically opens if you select a PDF inbox in the section Navigation in the procedure. When you drop the invoice on the invoice viewing window the PDF file will be saved in the PDF inbox which you have marked.
Alternative 3 (Monitor-to-Monitor):
The invoice arrives as an e-invoice (PDF and XML) to a separate Monitor-to-Monitor inbox, and can then be registered/preliminary recorded. You can easily load the invoice in the Register supplier invoice procedure by double-clicking the invoice in the desktop component Inbox Monitor-to-Monitor to import it.
- In the box Scanned images you mark the invoice you want to delete.
- Click the button Delete
 on the toolbar.
 - Confirm you want to delete by clicking Yes.
- Save.
This is done in the Register supplier invoice procedure.
-
In the section Navigation in the procedure you select the inbox you wish to work with. It is enough that you select one PDF inbox. You can expand a Monitor-to-Monitor inbox or an XML inbox to select invoices to import. A few of the steps described below differs a bit depending on which of the above inboxes you have selected to work with.
You can minimize the section Navigation using the
 button or you can press Ctrl + E. This can be done to get more space after you have selected or imported an invoice.
 - PDF inbox: If there are multiple scanned invoices in the PDF inbox (you see the number of invoices displayed next to the inbox), use the buttons
 and
and  at the top of the invoice viewing window to browse until you see the invoice you want to register/preliminary record.
 - PDF inbox: if there is an order invoice and a purchase order number on the invoice, select Order number on the main row. A lot of the information is then automatically loaded from the purchase order, such as supplier, order link, etc. If there is no purchase order for the invoice you select Supplier in the header row.
- PDF inbox: Enter the invoice information under the Supplier invoice tab.
- Monitor-to-Monitor inbox and XML inbox: Select the invoice to import and click the Import button
 . An alternative is to double-click the invoice in the inbox. The invoice information is loaded and is then displayed in an import window. An image of the invoice is shown in the invoice viewing window.
 - Monitor-to-Monitor inbox and XML inbox: Check the information in the import window. A warning symbol
 is displayed if information on the invoice is missing in the database. The warning also has a tooltip with an explanation regarding the warning. Such warnings can be adjusted later on, if needed. In the import window it is also possible to change the supplier if that information is incorrect, and you also choose if our customer number for the supplier should be updated (default). If the information is OK you should click the Create button in the window which will then be closed. The information from the invoice is now entered under the Supplier invoice tab.
 - Select a Signer code if this has not yet been loaded based on the selected supplier.
- If you for example do not know which signer should authorize the invoice you can leave the Signer code field empty and instead check the Pending checkbox. You can also use Pending if you during registration of the invoice for example discover that additional information is needed before it is sent for authorization, or if you wish to await the arrival reporting of the purchase order it refers to. You can then load these invoices at a later time in the inbox called Pending under Navigation. During new registration an invoice is also automatically placed in the pending mode until a signer code has been selected.
- If you use preliminary recording you can also check the option Show preliminary entry under Posting, to see how the invoice will be posted.
- If you do not use preliminary recording you can pre-post the invoice by selecting an account under Posting, as a suggested account for the signer.
- If the invoice is to be directly final recorded without authorization you should check the option Final record under Posting. In that case you must also finish posting the invoice before you save it. Read more under Final record invoices below.
- If there is a purchase order for the invoice you open the Order link tab to link the purchase order (if you did not already select the order number, in that case the order will automatically be linked to the invoice). Also make sure the price each on the order row is the same as on the invoice, otherwise you should adjust the price on the order row. This should be done in order to create accurate purchase statistics. Also make sure other information on the order row is correct. If not, you should adjust the information. You may for example need to distribute differences between the invoice and purchase order on existing order row caused by incorrect delivered quantity, add an order row for freight charges, etc. You first need to unlock the quantity field using the padlock button
 if the arrived quantity should be adjusted (down).
 - If you for example need to use the posting of a previous invoice (from the same supplier) on the current invoice, you should go to the Recent invoices tab. Here you select the previous invoice in the upper box and then you, in the Include column in the bottom box, select the posting to include. Then click the button Copy posting
 .
. - Finally you should save the invoice in the procedure.
- PDF inbox and Monitor-to-Monitor inbox: The information in the window is reset after saving, and the procedure is then ready for registration of the next invoice. The invoice files (PDF and XML) in the Monitor-to-Monitor inbox will be automatically deleted when the invoice is saved.
- XML inbox: When you save the invoice it means the invoice files (PDF and XML) are automatically moved from the XML inbox to the filing folder registered for the XML inbox. If there are more invoice files in the inbox the next invoice will automatically be loaded to the import window and you can follow the steps again as of item 6 in the list above, if you wish to register more invoices. Otherwise you click the Cancel button in the import window.
If you use preliminary recording the invoice will be set as Preliminary recorded when you save it, otherwise it will be given the status Registered. If you have selected a signer code the Status EIM will be set to "Sent for authorization (Name)", where the signer's name is shown in brackets next to the status. If a signer list has been selected, the first signer in the specific authorization list will be shown. If Pending is checked for the invoice it will instead say "Pending" in Status EIM.
In order to load an already saved invoice, select Find invoice under Navigation and then select the invoice's Consecutive number on the header row. There you also see the consecutive number of the most recently registered invoice.
If you are a user who is to authorize an invoice you will be informed of when there is an invoice to authorize. You can become informed in the following ways:
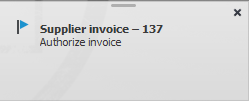
- Message shown a few seconds at the bottom right corner after you started Monitor ERP. Click the link in the message to go to Tasks in the Message center.

- Message shown with a red symbol with an exclamation mark on the Message center button
 . Open Tasks in the message center and select the EIM tab. Here you can select an invoice use the button
  to go to the Authorize supplier invoice procedure with the invoice loaded.
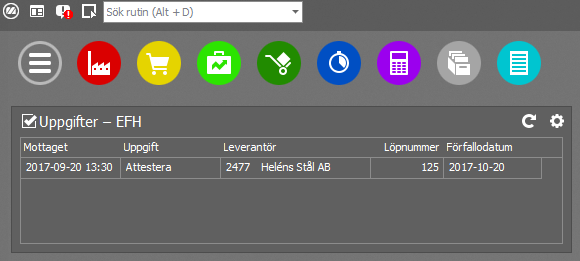
- The desktop component Tasks – EIM. You can double-click the task here to open the invoice in the Authorize supplier invoice procedure.

- Reminder via e-mail (scheduled in the Authorization settings – EIM procedure).
- Open the invoice in the Authorize supplier invoice procedure.
-
Link order/order rows under the Order link tab, if this has not yet been done.
Or you can authorize, forward, or reject the invoice, directly in the invoice viewing window. In that case you can skip items 3 to 7. Please note! You can enter a message for another signer. - Post the invoice by adding or modifying posting rows under Posting under the Supplier invoice tab.
- Check the A checkbox on each posting row to mark it as authorized. The Signer is then filled in on the row.
- In the invoice viewing window you can, when needed, type a message to a person in the work flow.
- If you make changes to the invoice you can save the modifications but they are also automatically saved when the invoice is approved. The invoice remains in the procedure after you save.
- When you are finished you authorize the invoice using the Approve button
 on the toolbar or by pressing Ctrl + A on the keyboard. As an alternative you can choose to forward or to reject the invoice. See more information about this below.
When you have approved/authorized the invoice it is forwarded to the next signer in the process. If you are the final signer on the list, and you have approved the invoice, it will be sent ahead for final entry. The invoice is then placed in the For final entry folder under the navigation panel in the Register supplier invoice procedure. After having approved an invoice, the next invoice for you to authorize will automatically be loaded. If there is no more invoices to authorize, a message saying this will be shown.
It is also possible to forward invoices. If you click on the Forward button  or press Ctrl + F, a dialog box opens where you can select which action to take: if you want to forward the invoice or if you want to approve and forward it. In the left part of the dialog box you can select which signers/signer groups to which the invoice should be forwarded. When you have forwarded the invoice it will be removed from your tasks even if you have not approved/authorized it.
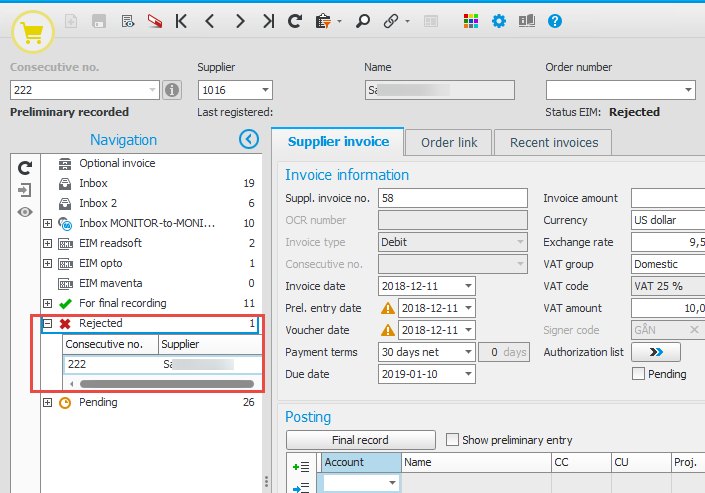
It is also possible to reject invoices. If you click the Reject button  you have to enter a message regarding why you reject the invoice. The invoice is then removed from the authorization round and is placed in the Rejected folder in the navigation panel in the Register supplier invoice procedure. You can reject an invoice if you for example need to send it back to the financial department to be further investigated. When you have rejected an invoice it will as Status EIM get "Rejected".
When an invoice is fully authorized it will be placed in the For final entry folder under the navigation panel in the Register supplier invoice procedure. The invoices you final record directly without authorization will also be placed here.
In the same way you receive information about when there is an invoice to authorize, you can be notified that there is an invoice to final record.
- Open the Register supplier invoice procedure and select the invoice under For final entry in the Navigation section.
- Check the Final record checkbox under Posting.
- Save the invoice.

When you have final recorded the invoice it will be marked as Fully paid and it is set as "Filed" in Status EIM.
If there are rejected invoices you can adjust, save, and leave them as rejected in the Register supplier invoice procedure. You can also see the message in the invoice viewing window about why the invoice was rejected and what needs to be adjusted. You can send a rejected invoice on a new authorization round when the problem has been fixed and the invoice has been adjusted. Open the signer list by using the button Signer list and add signers again. An alternative is to final record the invoice directly, if you have the user rights to do so.

In the procedure Invoice overview – EIM you can see information about supplier invoices in the EIM work flow. You can for example see which invoices that have been sent for authorization, which invoices that are fully authorized, and which invoices that are available for final coding. In the list type Statistics you can also see historical data regarding signer information for invoices that have been fully processed in the EIM flow. The statistics show the number of invoices that have been handled and it also shows the handling time per invoice. The list type Change signer is possible to update. There you can change the signer for invoices.
Invoices can be saved without an invoice image (loaded PDF/TIFF file). If you do not have a loaded file you need to check the option Save without image on the header row in order to be able to save. It is possible to add enclosures/attachments in connection with new registration of invoices.
It is possible to add files afterwards as well. You open the invoice viewing window with the button Show invoice image  . In that window you can use the button Add document/enclosure
  to open a dialog where you enter the file path, which document/enclosure type to add, and if the file should be deleted locally after it has been added in Monitor ERP. The attachment types are handled in the Scan supplier invoices procedure. You can also choose to replace existing documents/enclosures or delete enclosures.


