Selection rows
You can use Ctrl + F to open a search field so you can search among the selectable selection rows.
If you use Extra fields, these are also available under Selectable selection rows.
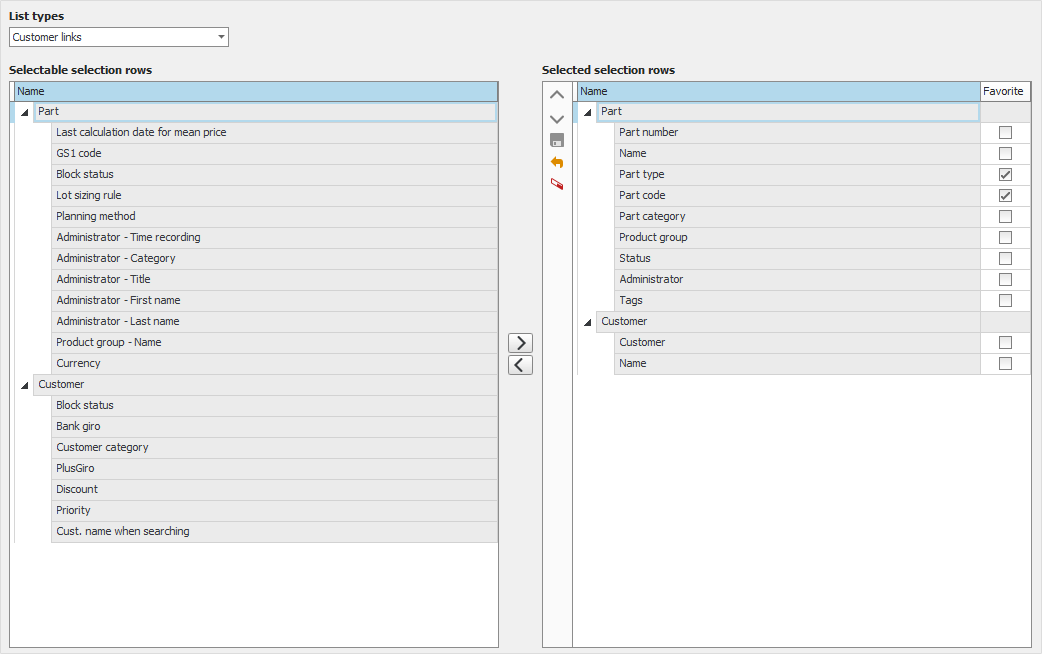
If it is a list procedure you can in the List type field choose for which list type you want to adapt the selection rows.
Here you find a table with Selectable selection rows and a table with Selected selection rows. Using the buttons between the tables you can add  or delete
  selection rows. Using two other buttons you can also move the selected selection rows around and change the order of them: up
  or down
  in the table. You can also add, delete, or move selection rows by dragging and dropping the selection rows with your mouse pointer.
In the table containing selected selection rows you can also check the checkbox Favorite for the rows which you most often use when you select data in the procedure. Rows you have marked as favorites are then shown at the top of the Selection tab in a separate section called Favorites.
Using the Clear button  you clear the selected selection rows. Using the Save button
  you save the selected selection rows. Using the Reset button
  you reset the selected rows table to the standard design.


