Option lists
In this procedure you create and update your Option lists.
On the header row in the procedure you enter a name and a code for the option list. The name is shown during registration of orders and can also be shown on documents. The code is shown in rules. You can enter a Category a Comment, and you can link Files which can function as an instruction during order registration.
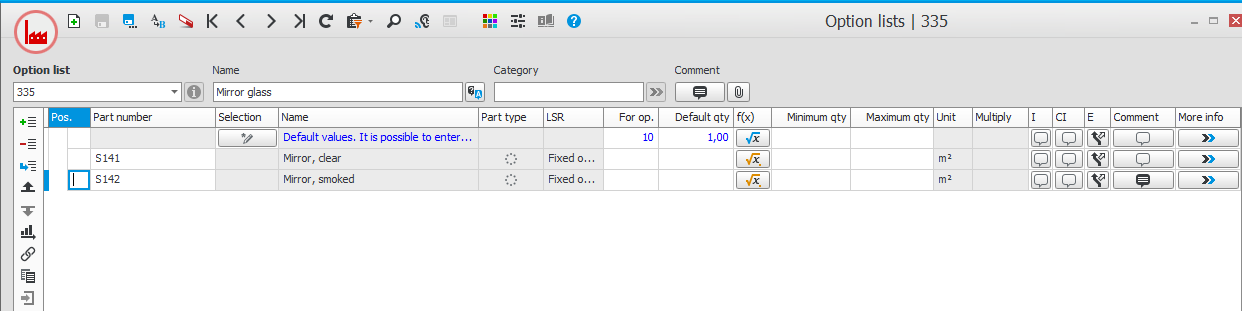
Below the header row you enter the options which should be available. That is, which parts the option list should contain.
The options works as material rows in an manufacturing order. Most fields are the same as on the material rows in BOM and routing.
There are two methods to enter options (which can also be combined). This is to:
- Add the parts in the list. Tip! If there are many parts you can paste them from a Part Clipboard using the button
 .
. - Enter a Selection of parts under the button
 on the top row in the list. This selection is defined in the same way as a selection for a list. You can for example enter that all parts with the part code "Steel" and status "Normal" should be included. This method is particularly appropriate to use if there are many options or if new options are often added.
The tops row also functions as default for field values to the other rows, but it is possible to make exceptions per field and per row.
It is possible to change the order of the options by using the drag and drop function or by using the buttons Move up  and Move down
  on the function menu. You can also change the order by selecting a sorting under the Sort
  button.
Use the button Add sub-row  (Ctrl + Shift + F5) to add sub-rows for parts. These are part which should always be included by default for the option on the row above.
For each option it is also possible to enter a comment on the row which will be shown when registering the order.
Function to inherit options
There is a function whereby choices made on an order row/quote row are automatically selected on the next order row/quote row that is entered. You can also choose to include the quantity selected in the function. The function is controlled by the two fields on the main row named Inherit options and Identifier.
The function also works between totally different configured parts, since you enter an identifier that determines which option lists that will inherit from each other.
For example, if you enter "Color" as Identifier, the options in this option list will be inherited on the following order row/quote row, providing there is an option list in this configuration which has "Color" as identifier. That is, it does not have to be the same option list or the same main part on the next order row/quote row. This can be useful, for example, if you have a door frame in a certain color, and in the following option list, for a door leaf, you want the same color to be inherited automatically.
The identifier for the option lists will link the different options lists, even if, as shown in the example, there are two different option lists for door frame and door leaf.
If, at a later stage, you change the option on an order row, you can choose if these changes will be inherited by other order rows.


