Settings for EIM
Here we have described the different settings required to configure before you can start using EIM in Monitor ERP.
In this procedure you configure settings regarding different user rights for the users who will be working with EIM.
The Roles/User rights tab
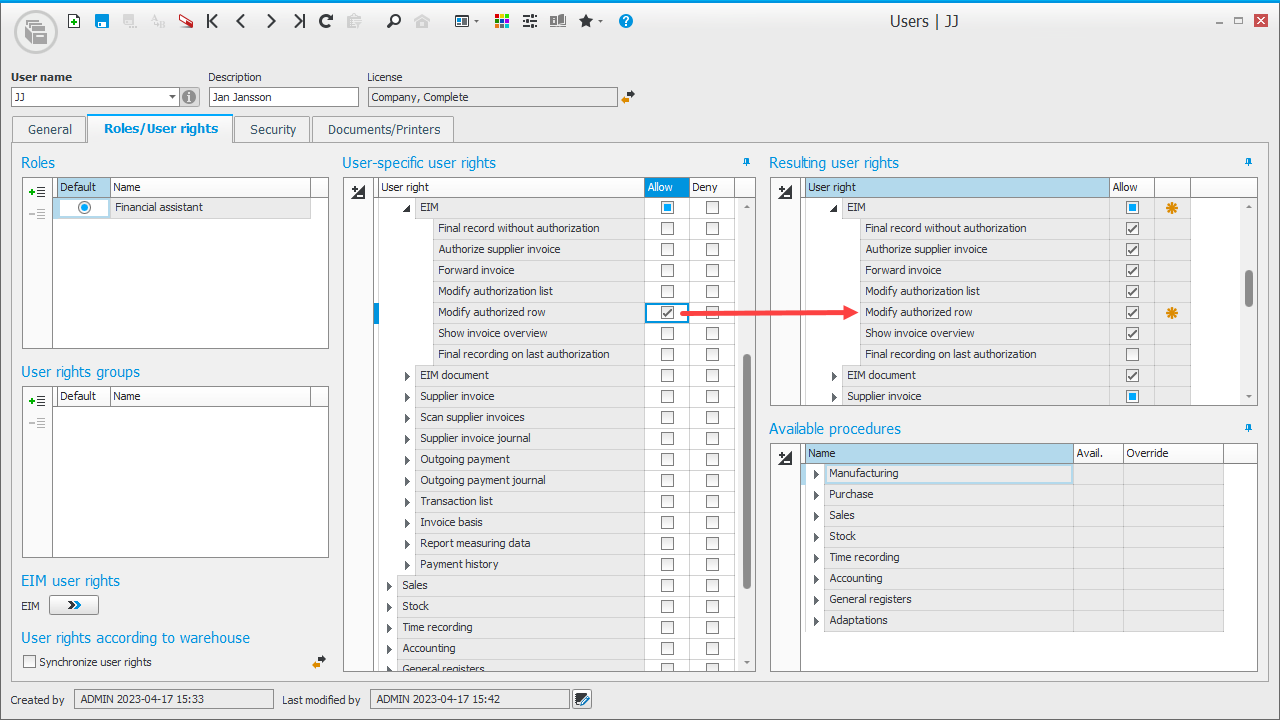
There are predefined user rights for EIM in the different roles included in the system, for example the roles Financial manager and Purchaser. In the box Resulting user rights you see all the user rights included in a role after you have added the role to the user. In most cases the roles available for the users of EIM are sufficient, but in some cases you also need to configure unique user rights for these users. For EIM you configure the settings in the sections called Scan documents, EIM, and EIM document in the box User-specific user rights.
In the example above a user with the role Financial assistant has also been given permission to change authorized row, which is then shown in the box Resulting user rights.
If the user should be able to authorize supplier invoices in the mobile client, the Allow login to mobile client setting under the Security settings tab, must be activated.
You should only activate the system setting called Use extended authorization on posting rows if you want it to be possible to enter who should review/authorize the invoice on posting row level for expense invoices. This setting also determines the head signer for both expense invoices and material invoices (order invoices). Via settings on accounts and dimensions you can determine who should authorize each posting row depending on the posting. This applies to systems with EIM and EIM Workflow.
With the system setting Activate EFH Workflow you can activate the EFH Workflow option. When you purchase EFH Workflow, the system setting is deactivated by default.
If the user should receive a link to the mobile client in the e-mail regarding invoices to authorize, you must enter the address to the mobile client’s web server in the system setting called Mobile client URL which you find under the Mobile client tab.
In this procedure you make settings for authorization of supplier invoices.
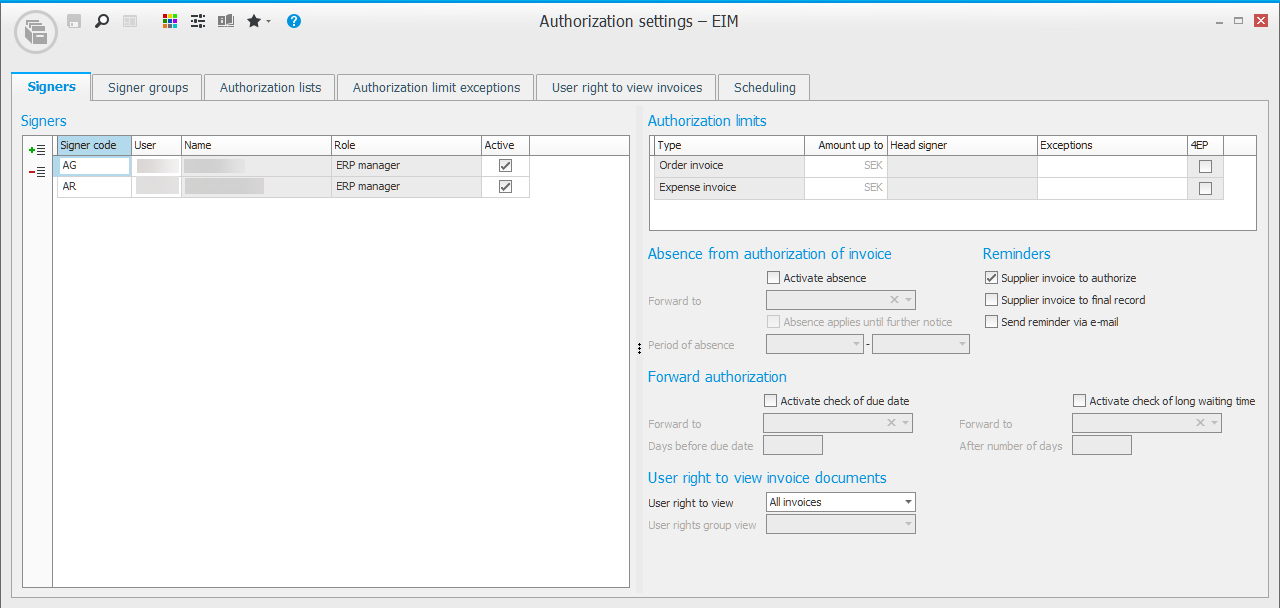
The Signers tab
Add the users who should authorize supplier invoices. Complement with settings for Authorization limits, Absence from authorization of invoice, Reminders, Forward authorization, and User right to view invoice documents. The final setting can also be found under the EIM button in the Users procedure. The Reminders settings also determine whether reminders should be shown in the Tasks – EIM desktop component.
The Signer groups tab
Create signer groups, if needed. In a signer group it is enough if one of the included signers authorize the invoice, then the invoice can go ahead in the flow. This is different from an authorization list where it is required that all signers in the list authorize the invoice.
The Authorization lists tab
Create authorization groups, if needed. An authorization list is a list of signers, and the invoice must be authorized by all signers in the list before it can be final recorded. In distinction from a signer group, when an invoice is sent to an authorization list it needs to become authorized by all signers in the order of the list.
An authorization list can have Parallel authorization. If you activate this setting, the invoice will be sent for authorization to all signers at the same time, that is, the invoice does not have to be authorized in a specific order.
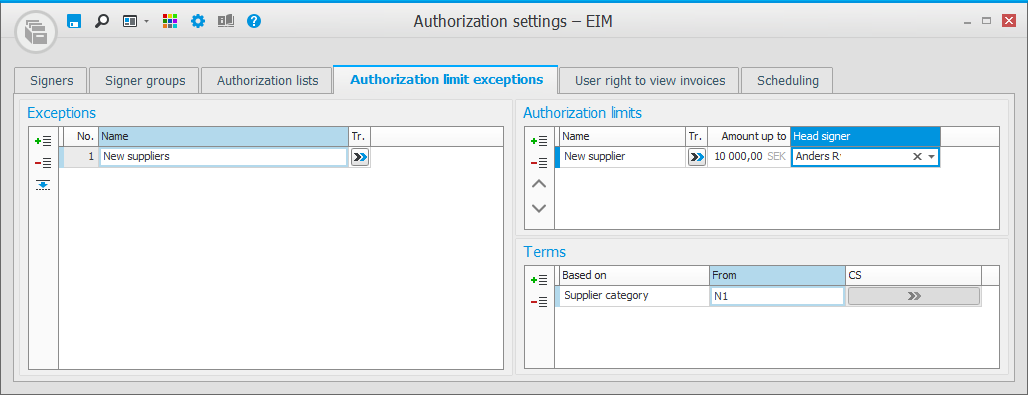
The Authorization limit exceptions tab
Create exceptions from authorization limits, if needed. These exceptions might be based on supplier category, supplier group, or supplier.
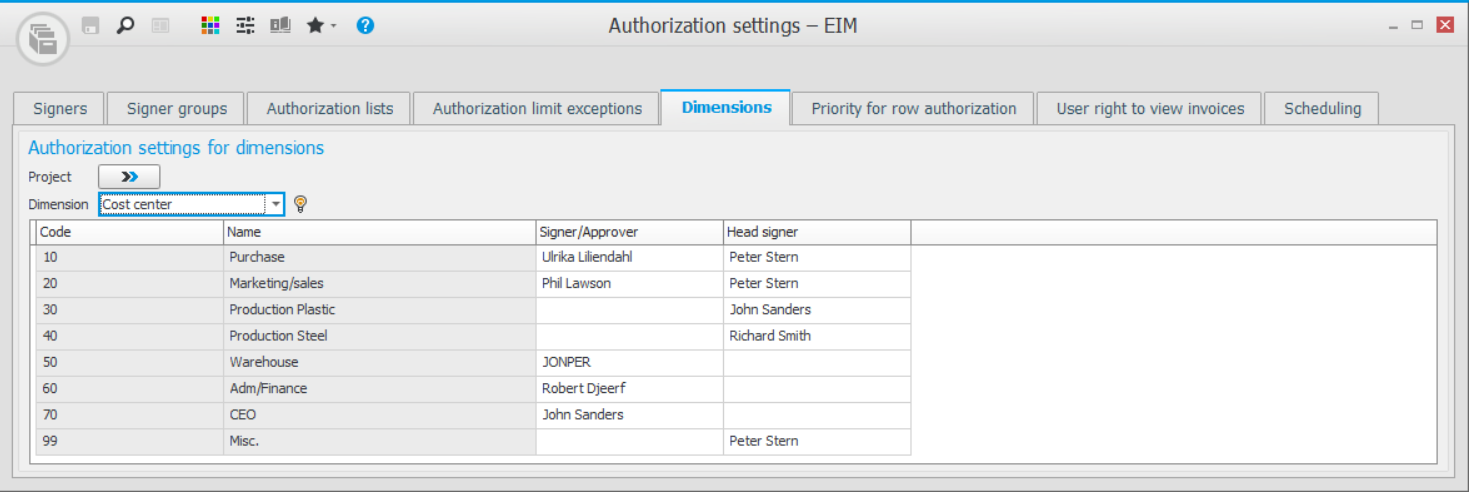
The Dimensions tab
If you apply authorization at row level (activated with the system setting called Use extended authorization on posting rows, this tab will be available. Here you configure Signer/Approver and Head signer per dimension code. For projects you can select Project manager or Our reference from the Project register as Signer/Approver and Head signer.
The Priority for row authorization tab
If you apply authorization at row level (activated with the system setting called Use extended authorization on posting rows, this tab will be available. Here you enter the central rules regarding priority which determine who should be the signer/head signer of the row if there are multiple persons responsible for the same posting row. For example, that authorized signer for the account is carry more weight than the authorized signer for the cost center.

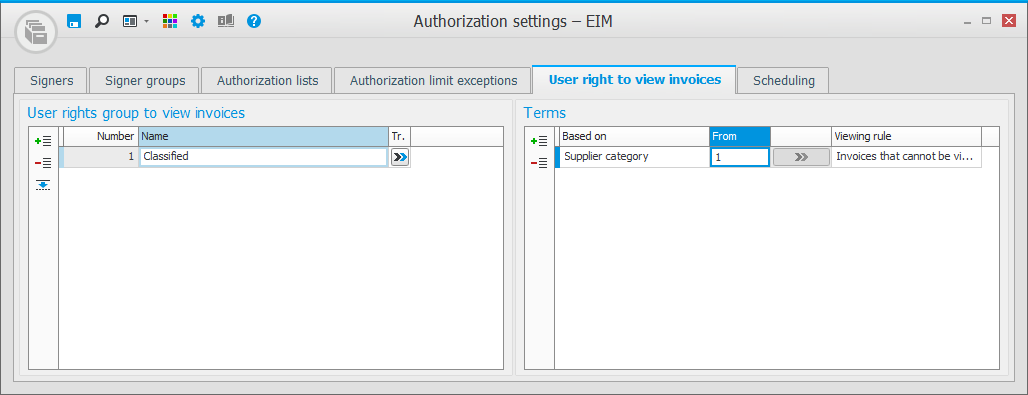
The tab User right to view invoices
Create user rights groups for viewing of invoices and configure terms per group regarding which invoices should be shown and not. A signer can then, if needed, be linked to a user rights group.
The Scheduling tab
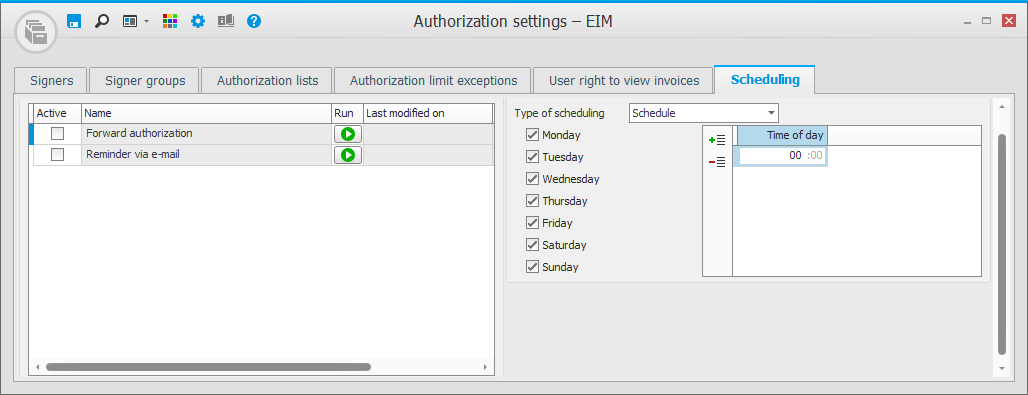
Activate the two services called Forward authorization and Reminder via e-mail and select a schedule or a time interval in the Settings box, this will determine when the services will run. Using the Run button  you can also run the services manually. Also make settings in the box Settings for Reminder via e-mail for the service Reminder via e-mail.
In this procedure you can add an e-mail account tied to an Exchange or IMAP e-mail server and select the type Monitor-to-Monitor for the account in question. The purpose is to get incoming Monitor-to-Monitor e-mail invoices straight in to the EIM work flow. Using the button Validate selected address  you can test that the account settings are correct. If they are correct, a green check mark will be shown in the column to the far left. If the information has not been entered in a correct way, a yellow warning symbol
  will be shown. Incoming Monitor-to-Monitor e-mail invoices will then automatically be placed in the separate inbox called Inbox Monitor-to-Monitor in the Register supplier invoice procedure. This inbox is also available as a desktop component (see further down).
In this procedure you configure settings regarding scanning of documents. These settings are in Monitor ERP configured on the computer where the scanner is installed. You can also use the procedure to scan new paper invoices.
On advanced scanners there is a display where you can choose how/where to save the files. If you have such a scanner you can on the scanner select to save the files in the folder you have configured as inbox, as described to below. Then you do not need to use the Scan documents procedure when scanning.
The Scan tab
Configure settings for scanner and select a path to the inbox in the Settings box The path must be entered in the box PDF inboxes under the next tab.
The tab Paths for inboxes
In the box called PDF inboxes under this tab, you register at least one path to a folder which will be the PDF inbox for scanned paper documents. This is where the PDF files should be saved at the scanning.
If other users of the EIM should have access to scanned documents in the inbox during registration in the Register supplier invoice procedure, then the path should point to a shared folder on a computer in the network. The other users must have the permission to Modify in Windows for that folder.
The Attachment types tab
Register the attachment types you need, in addition to Invoice which is included in the system. Attachment types is a label for other types of documents that can be added to scanned invoices, for example delivery notes, purchase orders, travel claims, etc. When such a document is added to an invoice using the button Add document  in the invoice viewing window, then you can select one of the attachment types created here.
The Settings tab
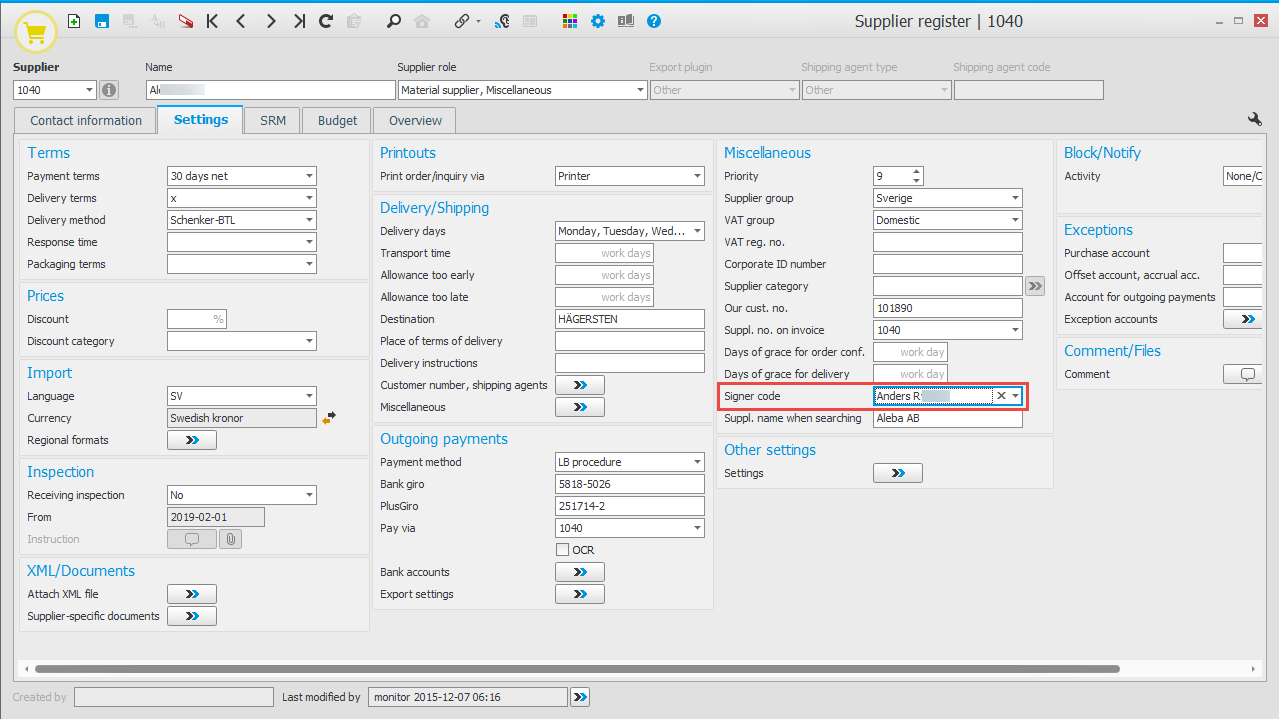
Select a default Signer code per supplier. The signer codes you can select among are the signers and authorization lists registered in the procedure Authorization settings – EIM. The selected signer or authorization list will then be default to authorize invoices from the supplier in question.
If you apply posting on row level (activated via the system setting called Use extended authorization on posting rows, you may have to enter a Signer/Approver and Head signer for accounts.
Desktop
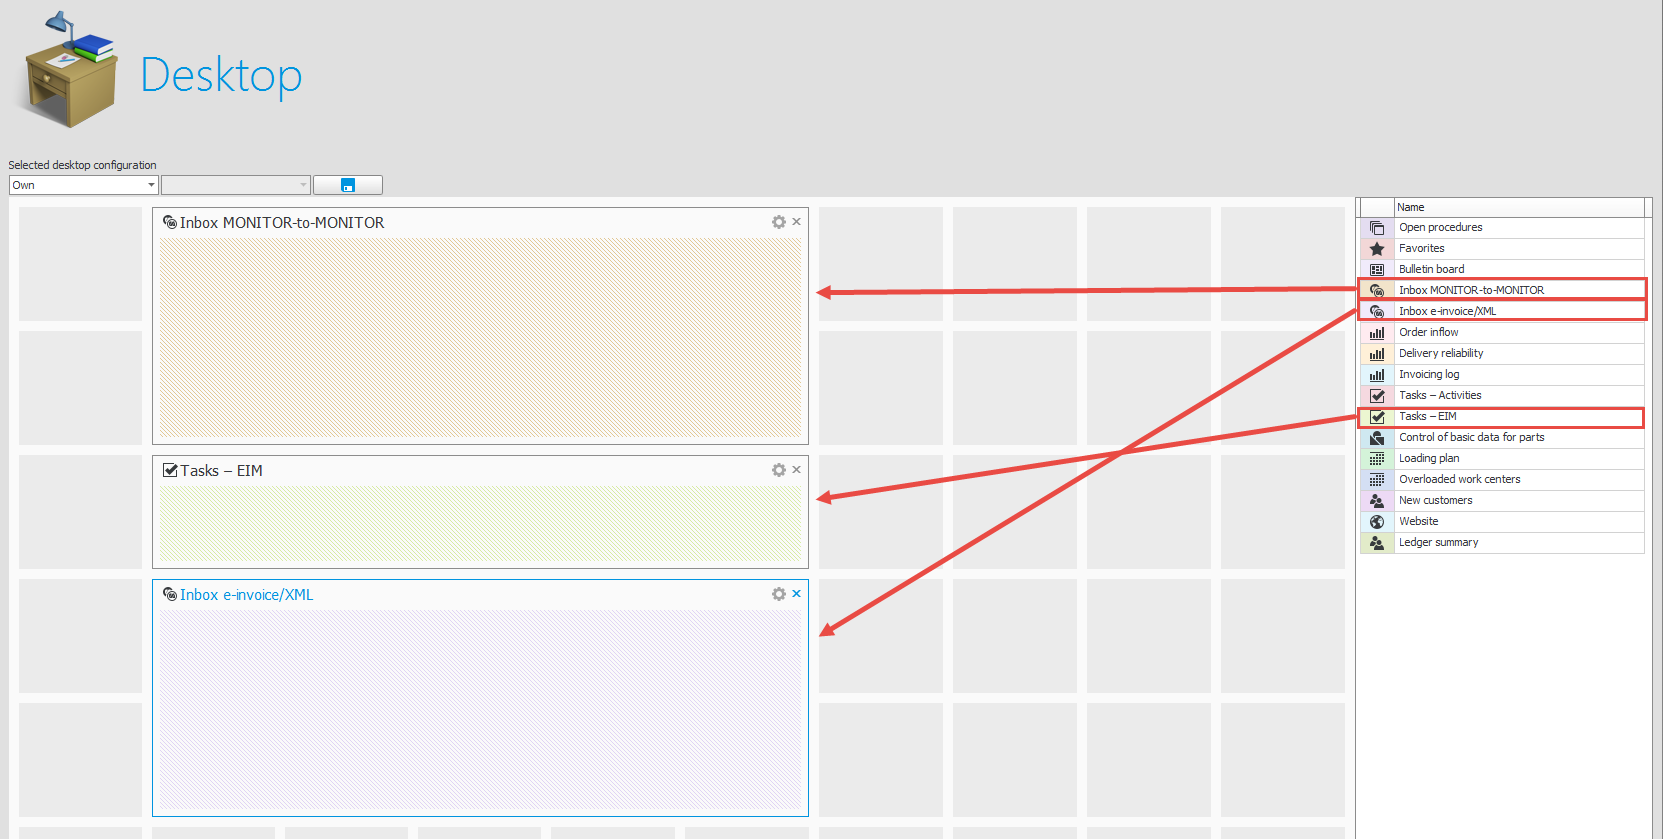
All users who are signers can add the components Tasks – EIM and Inbox Monitor-to-Monitor, and Inbox e-invoice/XML in their desktop configuration. An alternative is than the administrator adds these components in a desktop template which the signers can then use.
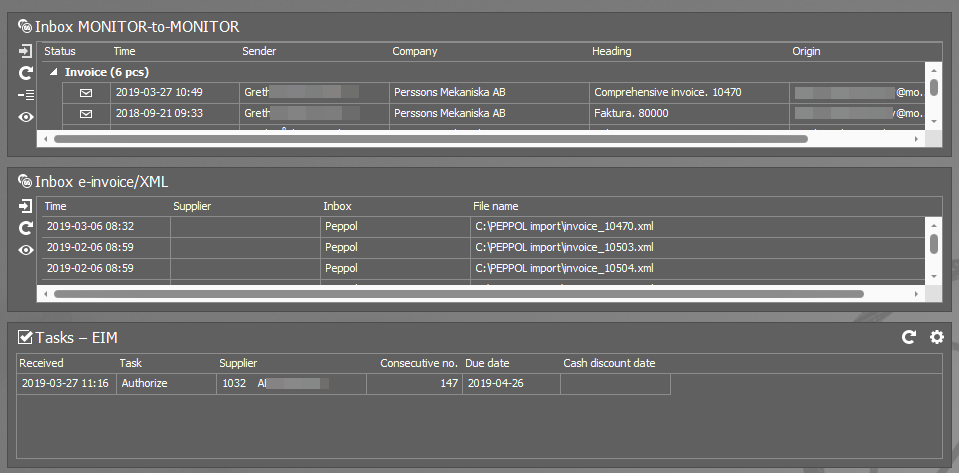
Having these three components on your desktop will make it easier to monitor activities related to supplier invoices and you can also easily register/preliminary record invoices.
You can double-click a task on the desktop, this will take you to Tasks and you can perform the task assigned to you.
You can double-click an invoice in the inbox, this will take you to Register supplier invoice with the invoice loaded, to register/preliminary record the invoice.
The component called Inbox e-invoice/XML displays the e-invoices/XML files which have been received. The component scans the XML inboxes which are registered under Paths for inboxes in the Scan supplier invoices procedure. If you have received invoices, you can start the import by clicking  or double-clicking on the row. You can start downloading from the operator’s server manually by clicking
  . Click
  in order to preview the PDF invoice.
